上面是采用mysqldbcompare工具,对比数据库的信息是否一致。
percona-toolkit官网:https://www.percona.com/doc/percona-toolkit/LATEST/installation.html
我们可以使用percona-toolkit工具做校验,而该工具包含
1. pt-table-checksum 负责检测MySQL主从数据一致性
2. pt-table-sync负责挡住从数据不一致时修复数据,让他们保存数据的一致性
3. pt-heartbeat 负责监控MySQL主从同步延迟
一致性校验思路:
1、确定校验的主库,根据需要校验的表,分段获取数据
2、与从库进行校验(根据id)
3、校验的过程发现数据不一致的时候
4、在主库创建一个表 记录校验不一致的数据
5、恢复只需要读取这个表
工具下载:https://downloads.percona.com/downloads/percona-toolkit/percona-toolkit-3.3.0/binary/redhat/7/x86_64/percona-toolkit-3.3.0-1.el7.x86_64.rpm
 1
 2
 3
 4
 5
 6
 7
 8
 9
10
11
12
13
14
15
16
17
18
19
20
21
22
23
24
25
26
|
非docker容器安装
yum install perl-IO-Socket-SSL perl-DBD-MySQL perl-Time-HiRes perl perl-DBI -y
wget https://downloads.percona.com/downloads/percona-toolkit/percona-toolkit-3.3.0/binary/redhat/7/x86_64/percona-toolkit-3.3.0-1.el7.x86_64.rpm

yum install percona-toolkit-3.3.0-1.el7.x86_64.rpm

yum list | grep percona-toolkit -y

[root@Master new_date]# yum list | grep percona
percona-toolkit.x86_64                   3.3.0-1.el7                   installed


docker容器中安装
apt-get update

apt-get install percona-toolkit


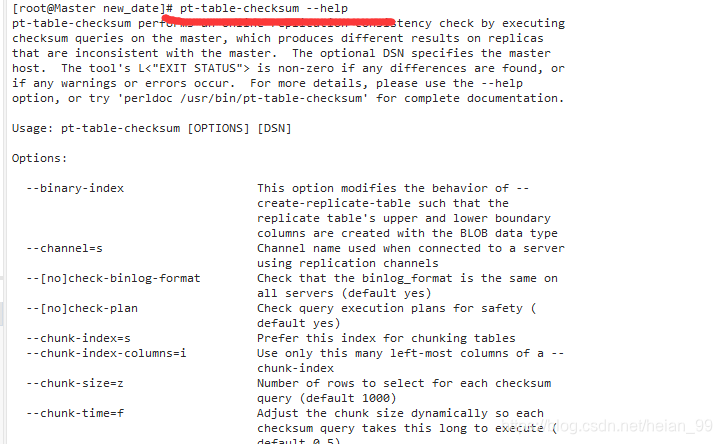
pt-table-checksum --help

pt-table-checksum使用
pt-table-checksum [options] [dsn]

pt-table-checksum:在主(master)上通过执行校验的查询对复制的一致性进行检查,对比主从的校验值,从而产生结果。DSN指向的是主的地址,该工具的退出状态不为零,如果发现有任何差别,或者如果出现任何警告或错误,更多信息请查看官方资料。
|
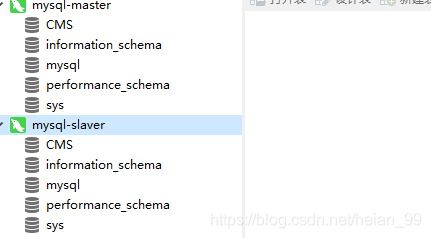
1、准备实战模拟一下数据的不一致,首先在主库中创建一个数据库,创建数据表,然后添加一些数据
环境已经准备好
有需要的可以参考
这边我才用docker来模拟,环境很快构建完成来演示。
下面是链接,可以参考
2、主库中进行检测数据是否一致
 1
 2
 3
 4
 5
 6
 7
 8
 9
10
11
12
13
14
15
16
17
18
19
|
create database mytest;

use mytest;

create table user(
    id int auto_increment not null primary key,
    name varchar(20)
)engine=InnoDB charset=utf8;


show tables;

insert into user values (1,'aa');

insert into user values (2,'bb');

insert into user values (3,'cc');

select * from user;
|
 1
 2
 3
 4
 5
 6
 7
 8
 9
10
11
12
13
14
15
16
17
18
19
20
21
22
23
24
25
26
27
28
29
30
31
32
33
34
35
36
37
38
39
|
注意常用的参数解释:
--nocheck-replication-filters :不检查复制过滤器,建议启用。后面可以用--databases来指定需要检查的数据库。

--no-check-binlog-format : 不检查复制的binlog模式,要是binlog模式是ROW,则会报错。

--replicate-check-only :只显示不同步的信息。

--replicate= :把checksum的信息写入到指定表中,建议直接写到被检查的数据库当中。

--databases= :指定需要被检查的数据库,多个则用逗号隔开。

--tables= :指定需要被检查的表,多个用逗号隔开

--host | h= :Master的地址

--user | u= :用户名

--passwork | p=:密码

--Port | P= :端口

检测
root@71399784f284:/# pt-table-checksum --nocheck-replication-filters --replicate=check_data.checksums --databases=mytest --tables=user --user=root --password=123456

Checking if all tables can be checksummed ...
Starting checksum ...
Replica 00847056d2fa has binlog_format ROW which could cause pt-table-checksum to break replication.  Please read "Replicas using row-based replication" in the LIMITATIONS section of the tool's documentation.  If you understand the risks, specify --no-check-binlog-format to disable this check.
1)上面的错误信息主要是因为,检测主库与从库的binlog日志的模式 - 通常来说可以不用改binlog添加 --no-check-binlog-format 跳过检测,但是可能也会出现如下的问题
root@71399784f284:/# pt-table-checksum --nocheck-replication-filters --replicate=check_data.checksums --databases=mytest --no-check-binlog-format --tables=user --user=root --password=123456
Diffs cannot be detected because no slaves were found. Please read the —recursion-method documentation for information.
2)问题原因是没有找到从库的地址,MySQL在做主从的时候可能会因为环境配置等因素,让pt-table-checksum没有很好地找到从库的地址 检测的方式:
1. 是否是指定在主库运行进行校验
2. 就是配置--recursion-method参数,然后在从库中指定好对应的地址
正确情况下:
root@71399784f284:/# pt-table-checksum --nocheck-replication-filters --replicate=check_data.checksums --databases=mytest --no-check-binlog-format --tables=user --user=root --password=123456
Checking if all tables can be checksummed ...
Starting checksum ...
            TS ERRORS  DIFFS     ROWS  DIFF_ROWS  CHUNKS SKIPPED    TIME TABLE
05-14T09:48:45      0      0        3          0       1       0   0.030 mytest.user
|
补充(pt-mysql-summary)
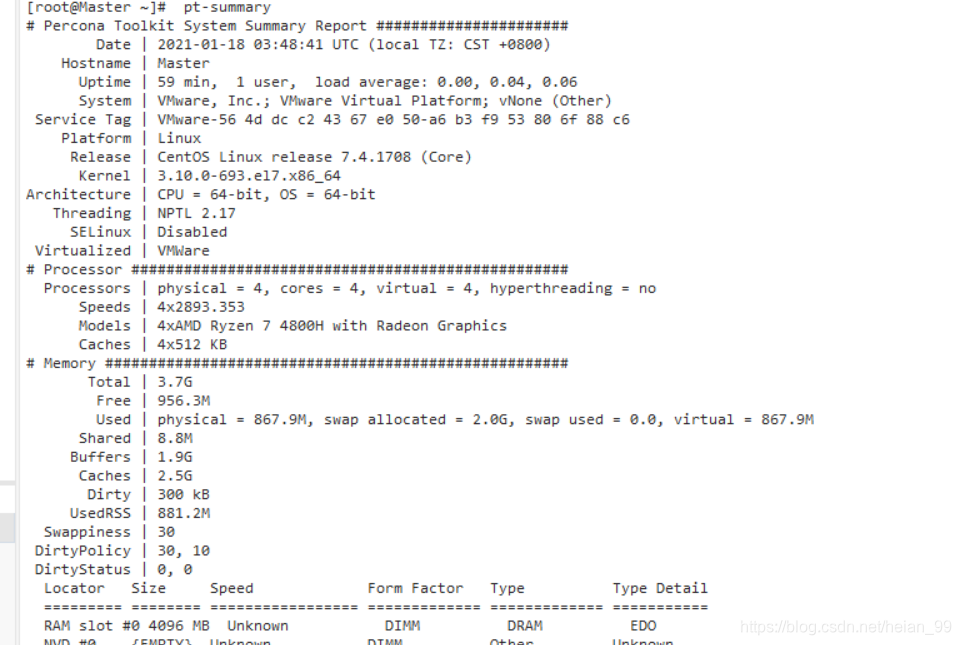
pt-summary #显示和系统相关的基本信息:
1
|
[root@master ~]# pt-summary
|
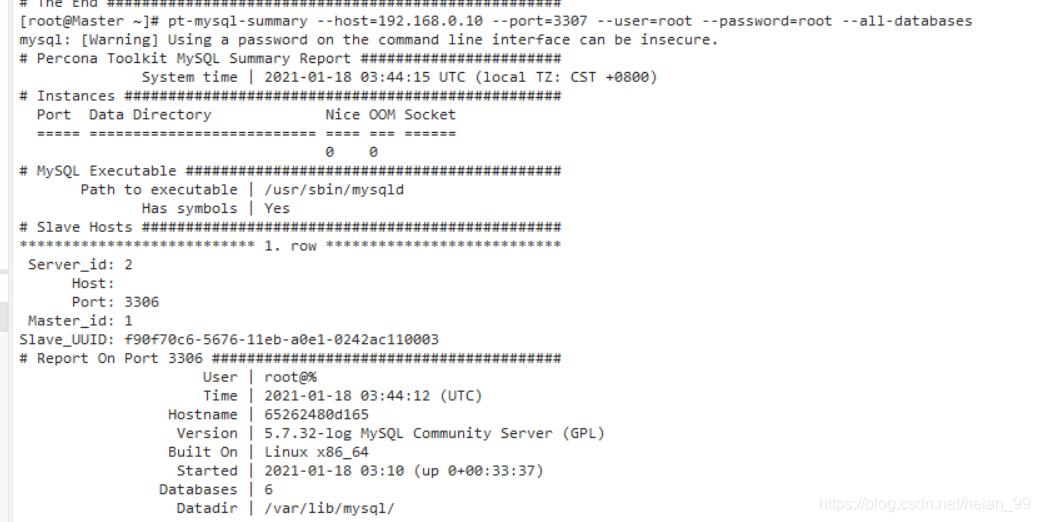
pt-mysql-summary #查看mysql的各个统计信息:
1
|
pt-mysql-summary --host=192.168.0.10 --port=3307 --user=root --password=root --all-databases
|
pt-slave-find #查找和显示指定的Master 有多少个Slave:
 1
 2
 3
 4
 5
 6
 7
 8
 9
10
11
12
|
[root@Master ~]# pt-slave-find --host=192.168.0.10 --port=3307 --user=root --password=root
192.168.0.10:3307
Version         5.7.32-log
Server ID       1
Uptime          36:46 (started 2021-01-18T11:10:35)
Replication     Is not a slave, has 1 slaves connected, is not read_only
Filters         binlog_do_db=CMS,CRM
Binary logging  ROW
Slave status
Slave mode      STRICT
Auto-increment  increment 1, offset 1
InnoDB version  5.7.32
|
pt-table-sync工具恢复数据
手册地址:https://www.percona.com/doc/percona-toolkit/LATEST/pt-table-sync.html
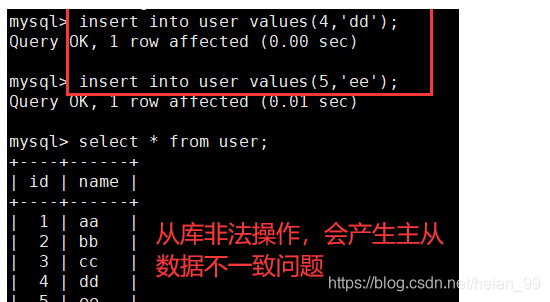
1、在从数据库中人为添加两条数据,从而让主从数据不一致
2、主库中进行检测数据一致性问题

3、主库打印恢复数据
 1
 2
 3
 4
 5
 6
 7
 8
 9
10
11
12
13
14
15
16
17
18
|
pt-table-sync --replicate=rep_test.checksums h=172.17.0.2,u=root,p=123456 h=172.17.0.3,u=slave_check,p=123456 --print

pt-table-sync --replicate=rep_test.checksums h=172.17.0.2,u=root,p=123456 h=172.17.0.3,u=slave_check,p=123456 --execute

或者
pt-table-sync --sync-to-master h=172.17.0.3,u=slave_check,p=123456,P=3306 --databases=mytest --print

pt-table-sync --sync-to-master h=172.17.0.3,u=slave_check,p=123456,P=3306 --databases=mytest --execute

--replicate= :指定通过pt-table-checksum得到的表,这2个工具差不多都会一直用。
--databases= : 指定执行同步的数据库,多个用逗号隔开。
--tables= :指定执行同步的表,多个用逗号隔开。
--sync-to-master :指定一个DSN,即从的IP,他会通过show processlist或show slave status 去自动的找主。
h=127.0.0.1 :服务器地址,命令里有2个ip,第一次出现的是Master的地址,第2次是Slave的地址。
u=root :帐号。
p=123456 :密码。
--print :打印,但不执行命令。
--execute :执行命令。
|


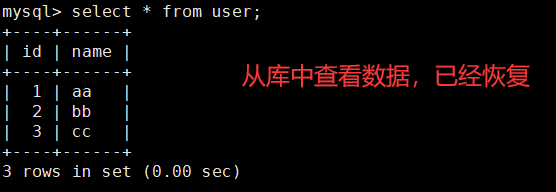
4、主库执行数据恢复 ,从库中查看数据发现已经恢复。


上面操作是手动执行的数据检测与数据恢复,但实际工作中是不可能每天手动这样进行操作的,那么怎么做呢?
接下来我们可以写一个shell脚本来定时执行检测与恢复操作,这样就可以省掉不少麻烦。
 1
 2
 3
 4
 5
 6
 7
 8
 9
10
11
12
13
|
vi /home/pt-check-sync.sh

#!/bin/bash
NUM=`pt-table-checksum --tables=user  --databases=mytest --user=root --password='123456' --replicate=check_data.checksums --no-check-binlog-format --recursion-method dsn=t=mytest.dsns,h=172.17.0.3,u=slave_check,p=123456,P=3306 | awk 'NR>1{sum+=$3}END{print sum}'`
if [ $NUM -eq 0 ] ;
then
    echo "Data is ok!"
else
    echo "Data is error!"
    pt-table-sync --sync-to-master h=172.17.0.3,u=slave_check,p=123456,P=3306 --databases=mytest --print

    pt-table-sync --sync-to-master h=172.17.0.3,u=slave_check,p=123456,P=3306 --databases=mytest --execute
fi
|
执行sh pt-check-sync.sh文件,也可以写定时器执行
 1
 2
 3
 4
 5
 6
 7
 8
 9
10
11
12
13
14
15
|
apt-get update

apt-get install -y --no-install-recommends cron

chmod +x ./docker-entrypoint.sh

# 保存环境变量,开启crontab服务
env >> /etc/default/locale
/etc/init.d/cron start

crontab -e

20 23 * * * /home/pt-check-sync.sh

表示每天晚上23:20运行这个脚本
|


