目录
1、用户的创建处理原始环境
2、下载,上传文件
3、解压二进制包
4、添加一个磁盘,挂载/data数据
5、创建数据路径并授权
6、设置环境变量
7、Mysql账号授权相应的文件
8、数据库初始化
9、配置文件的准备
10、启动数据库
11、如何分析处理MySQL数据库无法启动
12、管理员密码的设定(root@localhost)
13、管理员用户密码忘记了?
14、启动数据库到维护模式
RDBMS : 关系型数据库 管理系统
NoSQL : 非关系型的
NewSQL : 新型的分布式解决方案
1、用户的创建处理原始环境
1
2
3
|
[root@db01 ~]# yum remove mariadb-libs-5.5.60-1.el7_5.x86_64 -y
[root@db01 ~]# rpm -qa |grep mariadb
[root@db01 ~]# useradd -s /sbin/nologin mysql
|
MySQL 5.7.26 二进制版本安装
https://downloads.mysql.com/archives/get/p/23/file/mysql-5.7.26-linux-glibc2.12-x86_64.tar.gz
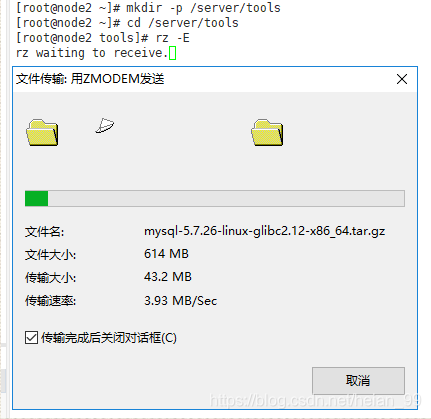
2、下载,上传文件
1
2
3
4
5
|
[root@db01 ~]# mkdir -p /server/tools
[root@db01 ~]# cd /server/tools/
[root@db01 /server/tools]# yum install -y lrzsz
[root@db01 /server/tools]# ls
mysql-5.7.26-linux-glibc2.12-x86_64.tar.gz
|
3、解压二进制包
1
2
3
|
[root@db01 /server/tools]# tar xf mysql-5.7.26-linux-glibc2.12-x86_64.tar.gz
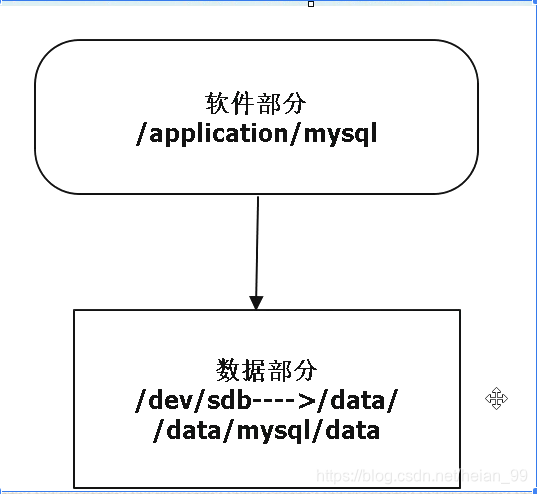
[root@db01 ~]# mkdir /application
[root@db01 /server/tools]# mv mysql-5.7.26-linux-glibc2.12-x86_64 /application/mysql
|
基本思路:把软件存放位置和数据存放位置分开,确保数据安全
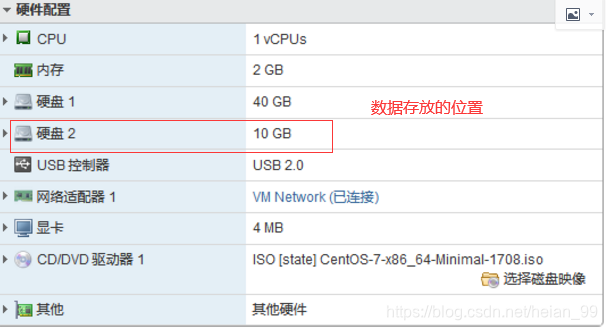
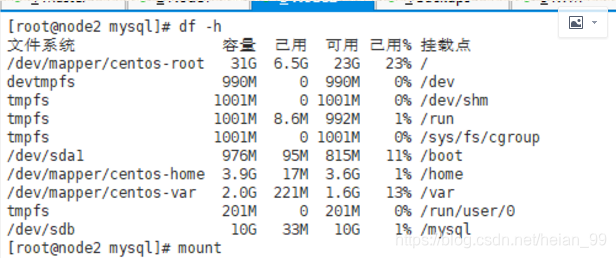
4、添加一个磁盘,挂载/data数据

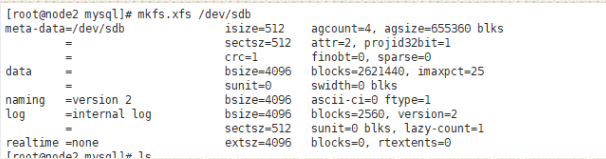
5、创建数据路径并授权
1
2
3
4
5
6
7
|
[root@db01 ~]# mkfs.xfs /dev/sdc
[root@db01 ~]# mkdir /mysql
[root@db01 ~]# blkid
[root@db01 ~]# vim /etc/fstab
[root@db01 ~]# UUID="7d7814c3-1ad2-4622-a435-7086d05d6c55" /mysql xfs defaults 0 0
[root@db01 ~]# mount -a
[root@db01 ~]# df -h
|

6、设置环境变量
1
2
3
4
5
|
vim /etc/profile
export PATH=/application/mysql/bin:$PATH
[root@db01 ~]# source /etc/profile
[root@db01 ~]# mysql -V
mysql  Ver 14.14 Distrib 5.7.26, for linux-glibc2.12 (x86_64) using  EditLine wrapper
|

7、Mysql账号授权相应的文件
1
2
3
|
授权
 chown -R mysql.mysql /application/*
 chown -R mysql.mysql /mysql
|
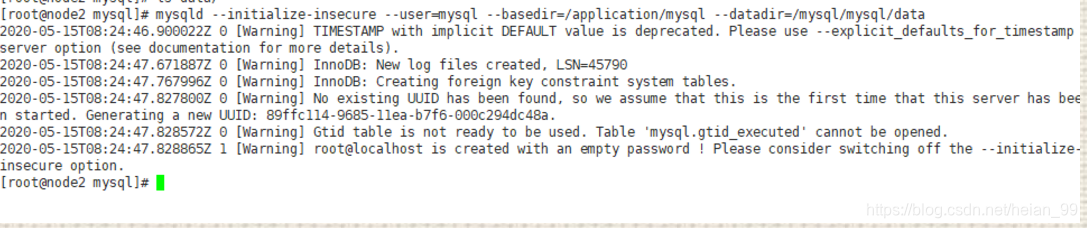
8、数据库初始化
1
2
3
4
5
|
5.6 版本 初始化命令  /application/mysql/scripts/mysql_install_db
# 5.7 版本
[root@db01 ~]# mkdir /mysql/mysql/data -p
[root@db01 ~]# chown -R mysql.mysql /mysql
[root@db01 ~]# mysqld --initialize --user=mysql --basedir=/application/mysql --datadir=/mysql/mysql/data
|
说明:
--initialize 参数:
- 1. 对于密码复杂度进行定制:12位,4种
- 2. 密码过期时间:180
- 3. 给root@localhost用户设置临时密码
--initialize-insecure 参数:
无限制,无临时密码
1
2
|
[root@db01 /data/mysql/data]# \rm -rf /data/mysql/data/*
[root@db01 ~]# mysqld --initialize-insecure --user=mysql --basedir=/application/mysql --datadir=/mysql/mysql/data
|
没有密码

9、配置文件的准备
 1
 2
 3
 4
 5
 6
 7
 8
 9
10
11
|
cat >/etc/my.cnf <<EOF
[mysqld]
user=mysql
basedir=/application/mysql
datadir=/mysql/mysql/data
socket=/tmp/mysql.sock
server_id=6
port=3306
[mysql]
socket=/tmp/mysql.sock
EOF
|
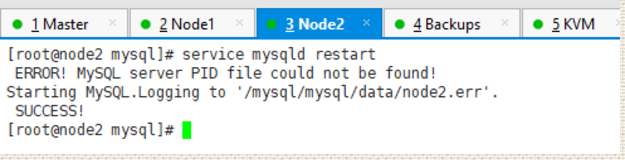
10、启动数据库
1. sys-v
1
2
|
[root@db01 /etc/init.d]# cp /application/mysql/support-files/mysql.server  /etc/init.d/mysqld
[root@db01 /etc/init.d]# service mysqld restart
|
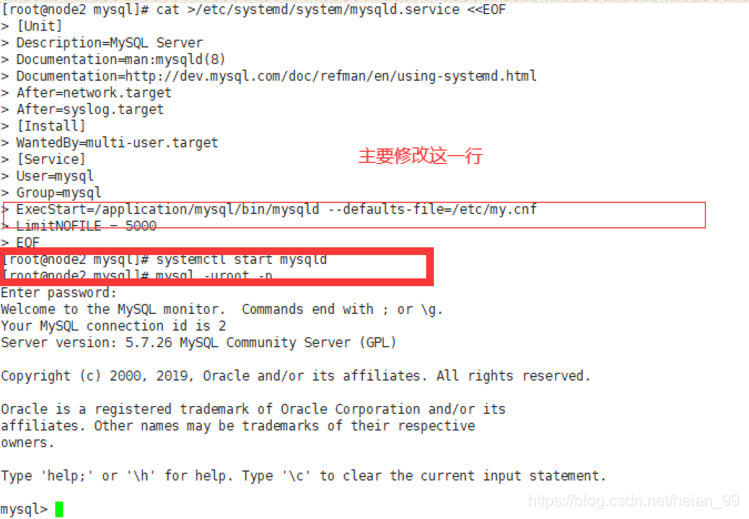
2. systemd
注意: sysv方式启动过的话,需要先提前关闭,才能以下方式登录
 1
 2
 3
 4
 5
 6
 7
 8
 9
10
11
12
13
14
15
|
cat >/etc/systemd/system/mysqld.service <<EOF
[Unit]
Description=MySQL Server
Documentation=man:mysqld(8)
Documentation=http://dev.mysql.com/doc/refman/en/using-systemd.html
After=network.target
After=syslog.target
[Install]
WantedBy=multi-user.target
[Service]
User=mysql
Group=mysql
ExecStart=/application/mysql/bin/mysqld --defaults-file=/etc/my.cnf
LimitNOFILE = 5000
EOF
|
11、如何分析处理MySQL数据库无法启动
without updating PID 类似错误
查看日志:
在哪?
/data/mysql/data/主机名.err
[ERROR] 上下文
可能情况:
/etc/my.cnf 路径不对等
/tmp/mysql.sock文件修改过 或 删除过
数据目录权限不是mysql
参数改错了
12、管理员密码的设定(root@localhost)
1
2
|
[root@db01 ~]# mysqladmin -uroot -p password oldboy123
Enter password:
|
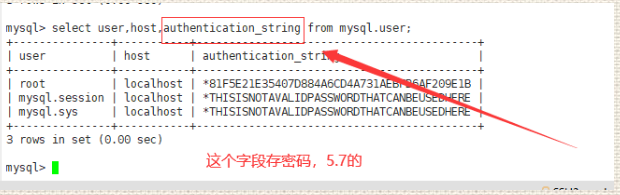
13、管理员用户密码忘记了?
1
2
|
--skip-grant-tables  #跳过授权表
--skip-networking    #跳过远程登录
|
14、启动数据库到维护模式
1
|
[root@db01 ~]# mysqld_safe --skip-grant-tables --skip-networking &
|
登录并修改密码
1
2
3
4
5
|
mysql> alter user root@'localhost' identified by '1';
ERROR 1290 (HY000): The MySQL server is running with the --skip-grant-tables option so it cannot execute this statement
mysql> flush privileges;
mysql> alter user root@'localhost' identified by '1';
Query OK, 0 rows affected (0.01 sec)
|
关闭数据库,正常启动验证