MySQL安全机制
========================================================
MySQL权限表
MySQL用户管理
MySQL权限管理
一、MySQL权限表
mysql.user Global level
用户字段
权限字段
安全字段
资源控制字段
mysql.db、mysql.host Database level
用户字段
权限字段
mysql.tables_priv Table level
mysql.columns_priv Column level
mysql.procs_priv
二、MySQL用户管理
1. 登录和退出MySQL
示例:
mysql -h192.168.5.240 -P 3306 -u root -p123 mysql -e ‘select user,host from user’
-h 指定主机名
-P MySQL服务器端口
-u 指定用户名
-p 指定登录密码
此处mysql为指定登录的数据库
-e 接SQL语句
查看用户表
用户管理
|
|
查看
|
|
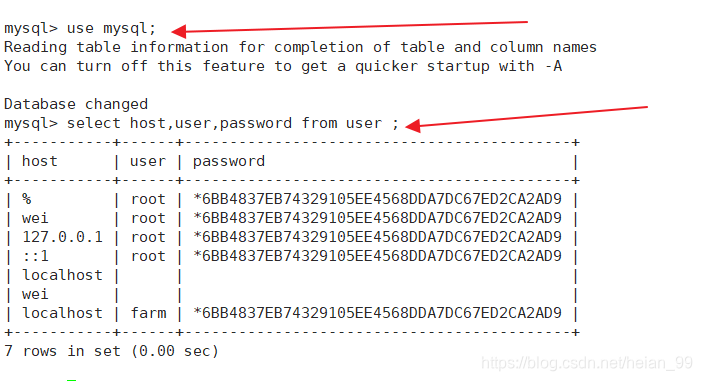
2. 创建用户
方法一:CREATE USER语句创建
|
|
刷新表
|
|
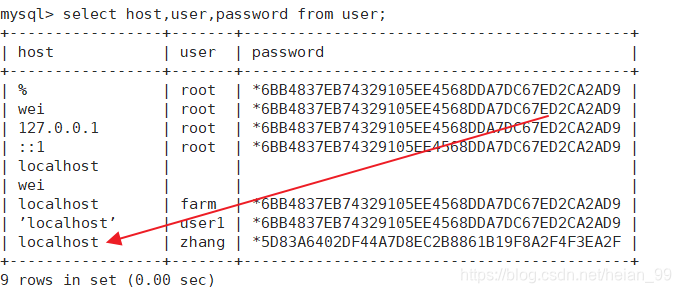
方法二: INSERT语句创建
|
|
|
|
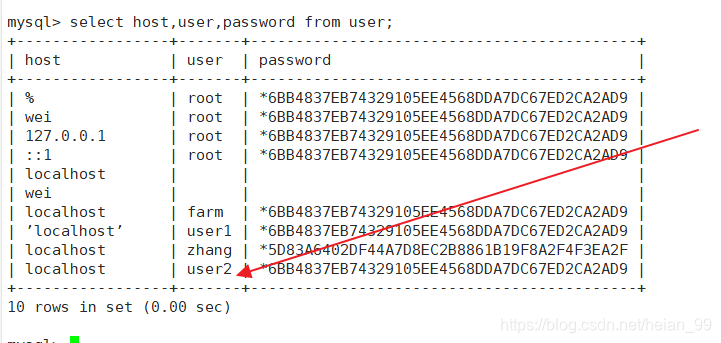
方法三: GRANT语句创建
|
|
|
|
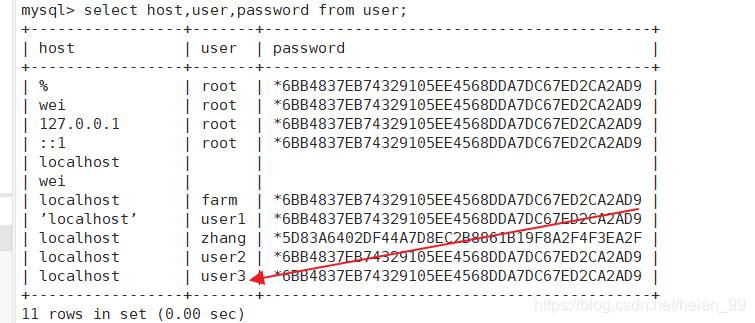
3. 删除用户
方法一:DROP USER语句删除
|
|
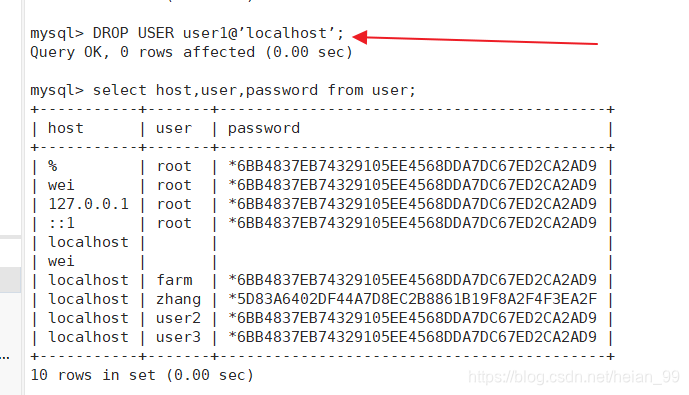
方法二:DELETE语句删除
|
|
|
|
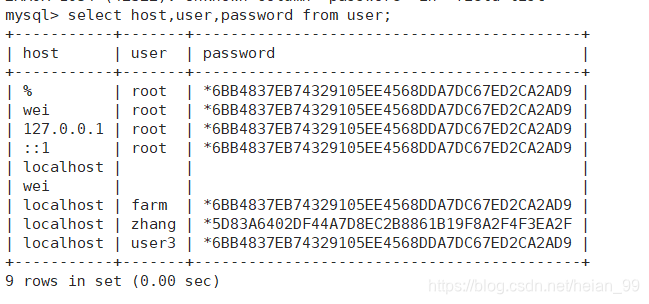
4. 修改用户密码
===root修改自己密码
方法一:
|
|
方法二:
|
|
方法三:
|
|
==root修改其他用户密码
方法一:
|
|
方法二:
|
|
方法三:
|
|
===普通用户修改自己密码
方法一:
|
|
方法二:
|
|
===丢失root用户密码
|
|
三、MySQL权限管理
权限应用的顺序:
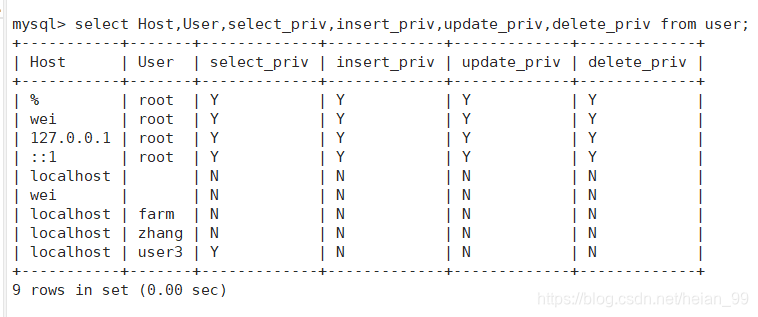
user (Y|N) ==> db ==> tables_priv ==> columns_priv
查看用户权限
|
|
语法格式:
grant 权限列表 on 库名.表名 to 用户名@‘客户端主机’ [identified by ‘密码’ with option参数];
==权限列表 all 所有权限(不包括授权权限)
select,update
==数据库.表名 *.* 所有库下的所有表 Global level
web.* web库下的所有表 Database level
web.stu_info web库下的stu_info表 Table level
SELECT (col1), INSERT (col1,col2) ON mydb.mytbl Column level
==客户端主机 % 所有主机
192.168.2.% 192.168.2.0网段的所有主机
192.168.2.168 指定主机
localhost 指定主机
with_option参数
GRANT OPTION: 授权选项
MAX_QUERIES_PER_HOUR: 定义每小时允许执行的查询数
MAX_UPDATES_PER_HOUR: 定义每小时允许执行的更新数
MAX_CONNECTIONS_PER_HOUR: 定义每小时可以建立的连接数
MAX_USER_CONNECTIONS: 定义单个用户同时可以建立的连接数
grant 普通数据用户,查询、插入、更新、删除 数据库中所有表数据的权利。
- grant select on testdb.* to common_user@’%’
- grant insert on testdb.* to common_user@’%’
- grant update on testdb.* to common_user@’%’
- grant delete on testdb.* to common_user@’%’
** MySQL 命令来替代:**
- grant select, insert, update, delete on testdb.* to common_user@’%’
grant 数据库开发人员,创建表、索引、视图、存储过程、函数。。。等权限。
grant 创建、修改、删除 MySQL 数据表结构权限。
- grant create on testdb.* to developer@’192.168.0.%’;
- grant alter on testdb.* to developer@’192.168.0.%’;
- grant drop on testdb.* to developer@’192.168.0.%’;
grant 操作 MySQL 外键权限。
- grant references on testdb.* to developer@’192.168.0.%’;
grant 操作 MySQL 临时表权限。
- grant create temporary tables on testdb.* to developer@’192.168.0.%’;
grant 操作 MySQL 索引权限。
- grant index on testdb.* to developer@’192.168.0.%’;
grant 操作 MySQL 视图、查看视图源代码 权限。
- grant create view on testdb.* to developer@’192.168.0.%’;
- grant show view on testdb.* to developer@’192.168.0.%’;
grant 操作 MySQL 存储过程、函数 权限。
- grant create routine on testdb.* to developer@’192.168.0.%’; – now, can show procedure status
- grant alter routine on testdb.* to developer@’192.168.0.%’; – now, you can drop a procedure
- grant execute on testdb.* to developer@’192.168.0.%’;
grant 普通 DBA 管理某个 MySQL 数据库的权限。
- grant all privileges on testdb to dba@’localhost’
grant 高级 DBA 管理 MySQL 中所有数据库的权限。
- grant all on *.* to dba@’localhost’
MySQL grant 权限,分别可以作用在多个层次上。
1. grant 作用在整个 MySQL 服务器上:
- grant select on *.* to dba@localhost; – dba 可以查询 MySQL 中所有数据库中的表。
- grant all on *.* to dba@localhost; – dba 可以管理 MySQL 中的所有数据库
2. grant 作用在单个数据库上:
- grant select on testdb.* to dba@localhost; – dba 可以查询 testdb 中的表。
3. grant 作用在单个数据表上:
- grant select, insert, update, delete on testdb.orders to dba@localhost;
4. grant 作用在表中的列上:
- grant select(id, se, rank) on testdb.apache_log to dba@localhost;
5. grant 作用在存储过程、函数上:
- grant execute on procedure testdb.pr_add to ’dba’@’localhost’
- grant execute on function testdb.fn_add to ’dba’@’localhost’
注意:修改完权限以后 一定要刷新服务,或者重启服务,刷新服务用:FLUSH PRIVILEGES。
Grant示例:
GRANT ALL ON *.* TO admin1@’%’ IDENTIFIED BY ’localhost’;
GRANT ALL ON *.* TO admin2@’%’ IDENTIFIED BY ’localhost’ WITH GRANT OPTION;
GRANT ALL ON bbs.* TO admin3@’%’ IDENTIFIED BY ’localhost’;
GRANT ALL ON bbs.user TO admin4@’%’ IDENTIFIED BY ’localhost';
GRANT SELECT(col1),INSERT(col2,col3) ON bbs.user TO admin5@’%’ IDENTIFIED BY ’localhost';
回收权限REVOKE
查看权限
SHOW GRANTS\G
SHOW GRANTS FOR admin1@’%’\G
回收权限REVOKE
语法:
REVOKE 权限列表 ON 数据库名 FROM 用户名@‘客户端主机’
示例:
REVOKE DELETE ON *.* FROM admin1@’%’; //回收部分权限
REVOKE ALL PRIVILEGES ON *.* FROM admin2@’%’; //回收所有权限
REVOKE ALL PRIVILEGES,GRANT OPTION ON *.* FROM ‘admin2’@’%’;
========================================================
