** 路漫漫其修远兮,吾将上下而求索**
inux文件目录权限管理
常规权限:
r read 读取 4
w write 写入 2
x execute 执行 1
文件:
r 查看文件内容(cat/more/less/head/tail/grep)
w 编辑文件内容(vim)
x shell/python脚本
目录:
r 查看目录的文件(ls/tmp)
w 修改目录的文件(新建,删除,mv)
x 切换目录(cd)
除去第一个,三个为一组
查看文件权限

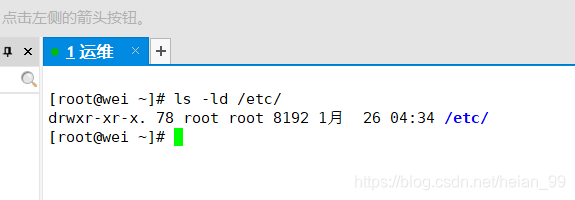
查看目录权限

设置文件目录权限
(1)chmod 修改权限
# chmod {augo}{+-=}{rwx} 文件名称
** a all 所有
u user 属主用户
g group 属组
o other 其他
# chmod a+x /tmp/1.txt
# chmod u-x,o+r /tmp/2.txt
# chmod nnn 文件名称**
权限设置例子:
 1
 2
 3
 4
 5
 6
 7
 8
 9
10
11
12
13
14
15
16
17
18
19
20
21
22
|
[root@wei ~]# ls -l /test/
总用量 0
-rw-r--r--. 1 root root 0 1月  25 10:42 1.txt
-rw-r--r--. 1 root root 0 1月  25 10:42 2.txt
-rw-r--r--. 1 root root 0 1月  25 10:42 3.txt
-rw-r--r--. 1 root root 0 1月  25 10:42 4.txt
-rw-r--r--. 1 root root 0 1月  25 10:42 5.txt
[root@wei ~]# chmod a+x /test/1.txt  #设置文件1.txt为所有用户可执行(x)
[root@wei ~]# ls -l /test/1.txt
-rwxr-xr-x. 1 root root 0 1月  25 10:42 /test/1.txt  #查看文件1.txt的权限
[root@wei ~]# chmod g-r,o-r /test/2.txt  #设置文件2.txt用户属组权限不可读,其他用户权限不可读
[root@wei ~]# ls -l /test/2.txt  #查看文件2.txt的权限
-rw-------. 1 root root 0 1月  25 10:42 /test/2.txt
[root@wei ~]# chmod g=rw /test/3.txt #覆盖文件3.txt用户属组的权限为可读可写
[root@wei ~]# ls -l /test/3.txt #查看文件3.txt的权限
-rw-rw-r--. 1 root root 0 1月  25 10:42 /test/3.txt
[root@wei ~]# chmod 600 /test/4.txt #设置文件4.txt的权限为主用户可读可写
[root@wei ~]# ls -l /test/4.txt
-rw-------. 1 root root 0 1月  25 10:42 /test/4.txt
[root@wei ~]# chmod 000 /test/5.txt       #设置5.txt的文件权限为所有不可读不可写不可执行
[root@wei ~]# ls -l /test/5.txt
----------. 1 root root 0 1月  25 10:42 /test/5.txt
|
(2)修改文件的属主,属组
# chown 用户名称.用户组名称 文件名称
1
2
3
4
5
|
[root@wei ~]# chown user1.caiwu /test/1.txt

[root@wei ~]# chown user1 /test/2.txt

[root@wei ~]# chown root.caiwu /test/4.txt
|
仅修改属组:
# chgrp 用户组名称 文件名称
1
|
[root@wei ~]# ls -l /test/3.txt
|
属组权限设置例子:
 1
 2
 3
 4
 5
 6
 7
 8
 9
10
11
12
13
14
15
16
17
18
19
20
|
[root@wei ~]# ls -l /test/
总用量 0
-rwxr-xr-x. 1 root root 0 1月  25 10:42 1.txt
-rw-------. 1 root root 0 1月  25 10:42 2.txt
-rw-rw-r--. 1 root root 0 1月  25 10:42 3.txt
-rw-------. 1 root root 0 1月  25 10:42 4.txt
----------. 1 root root 0 1月  25 10:42 5.txt
[root@wei ~]# groupadd caiwu # 添加用户属组caiwu
[root@wei ~]# chown user1.caiwu /test/1.txt  #把1.txt的主用户改为user,属组改为caiwu
[root@wei ~]# ls -l /test/1.txt
-rwxr-xr-x. 1 user1 caiwu 0 1月  25 10:42 /test/1.txt
[root@wei ~]# chown user1 /test/2.txt  #把2.txt的主用户改为user1,属组不变
[root@wei ~]# ls -l /test/2.txt
-rw-------. 1 user1 root 0 1月  25 10:42 /test/2.txt
[root@wei ~]# chgrp caiwu /test/3.txt  把3.txt的属组改为caiwu
[root@wei ~]# ls -l /test/3.txt
-rw-rw-r--. 1 root caiwu 0 1月  25 10:42 /test/3.txt
[root@wei ~]# chown root.caiwu /test/4.txt  #把#4.txt的主用户为root,属组为caiwu
[root@wei ~]# ls -l /test/4.txt
-rw-------. 1 root caiwu 0 1月  25 10:42 /test/4.txt
|
方法2
facl———–文件访问控制列表
设置权限:
针对单个用户设置权限
# setfacl -m u:用户名:权限 文件名称
1
|
[root@wei test]# setfacl -m u:user4:r /test/3.txt
|
针对单个用户组设置权限
# setfacl -m g:用户组名称 :权限 文件名称
1
|
[root@wei test]# setfacl -m g:caiwu:rwx /test/3.txt
|
查看权限
# getfacl 文件名称
 1
 2
 3
 4
 5
 6
 7
 8
 9
10
|
[root@wei test]# getfacl /test/3.txt
getfacl: Removing leading '/' from absolute path names
# file: test/3.txt
# owner: user1
# group: user3
user::rw-
user:user4:r--
group::rwx
group:caiwu:rwx
mask::rwx
|
删除权限
针对单个用户设置权限删除
# setfacl -x u:用户名:文件名称
1
|
[root@wei test]# setfacl -x u:user4 /test/3.txt
|
针对单个用户组设置权限删除
# setfacl -x g:用户组名称 文件名称
1
|
[root@wei test]# setfacl -x g:caiwu /test/3.txt
|
简单例子:
 1
 2
 3
 4
 5
 6
 7
 8
 9
10
11
12
13
14
15
16
17
18
19
20
21
22
|
[root@wei test]# setfacl -x u:user4 /test/3.txt
[root@wei test]# getfacl /test/3.txt
getfacl: Removing leading '/' from absolute path names
# file: test/3.txt
# owner: user1
# group: user3
user::rw-
group::rwx
group:caiwu:rwx
mask::rwx
other::r-x

[root@wei test]# setfacl -x g:caiwu /test/3.txt
[root@wei test]# getfacl /test/3.txt
getfacl: Removing leading '/' from absolute path names
# file: test/3.txt
# owner: user1
# group: user3
user::rw-
group::rwx
mask::rwx
other::r-x
|
特殊权限
suid 4
sgid 2
sticky bit 1
1,suid
作用:普通用户在执行命令期间,会临时获取到命令属主用户对操作系统的权限
设置suid权限
# chmod u+s 文件名称
2,sgid
针对目录设置
作用:目录拥有sgid权限后,在目录下创建的文件会继承目录的属组信息
设置sgid权限
**# chmod g+s 目录名称
**
 1
 2
 3
 4
 5
 6
 7
 8
 9
10
11
12
13
14
15
|
[root@wei ~]# mkdir /linux
[root@wei ~]# ls -dhl /linux
drwxr-xr-x. 2 root root 6 1月  25 11:55 /linux
[root@wei ~]# chgrp caiwu /linux
[root@wei ~]# ls -dhl /linux
drwxr-xr-x. 2 root caiwu 6 1月  25 11:55 /linux
[root@wei ~]# touch /linux/1.txt
[root@wei ~]# ls -l /linux/1.txt
-rw-r--r--. 1 root root 0 1月  25 11:56 /linux/1.txt
[root@wei ~]# chmod g+s /linux/
[root@wei ~]# ls -dhl /linux
drwxr-sr-x. 2 root caiwu 19 1月  25 11:56 /linux
[root@wei ~]# touch /linux/2.txt
[root@wei ~]# ls -l /linux/2.txt
-rw-r--r--. 1 root caiwu 0 1月  25 11:58 /linux/2.txt
|
3,sticky bit
针对目录设置
作用:只用目录下文件的属主用户,目录属主用户及root可删除的文件
设置sticky bit权限
# chmod o+t 目录名称
 1
 2
 3
 4
 5
 6
 7
 8
 9
10
11
12
13
14
15
16
17
18
19
20
|
公司部门 开发部(经理,员工1,员工2)
         /project
         (1)经理可以查看写
         (2)员工可以相互看,修改,但不能删除

[root@wei ~]# useradd jl
[root@wei ~]# useradd yg1
[root@wei ~]# useradd yg2
[root@wei ~]# mkdir /project
[root@wei ~]# chown jl /project/
[root@wei ~]# ls -dhl /project/
drwxr-xr-x. 2 jl root 6 1月  25 12:11 /project/
[root@wei ~]# usermod -G jl yg1
[root@wei ~]# usermod -G jl yg2
[root@wei ~]# chgrp jl /project/
[root@wei ~]# chmod g+w /project/
[root@wei ~]# chmod g+s /project/
[root@wei ~]# chmod o+t /project/
[root@wei ~]# ls -hdl /project/
drwxrwsr-t. 2 jl jl 6 1月  25 12:11 /project/
|
chmod chown chgrp setfacl
共同选项: -R 递归修改


